In OneLife & OneCoin, it is important to comply with the company’s policies. One critical requirement is to upload your KYC (Know-Your-Customer) documents as soon as your account is activated.
Your KYC documents identify you as the account holder. A concept similar when transacting to the bank or any financial institution, you need to identify yourself as the owner of the account.
If you have multiple OneLife/OneCoin accounts, you will only upload your KYC documents once. Follow the steps below in uploading your KYC documents in your OneLife Backoffice:
Steps:
- Login to your OneLife backoffice – https://onelife.eu

2. Once you logged in successfully, you will see your backoffice Dashboard. Hover in to your left, and click on ‘My Profile’
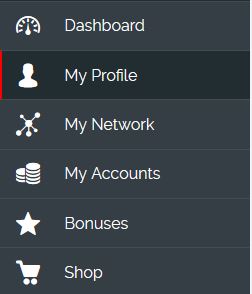
3. In the ‘My Profile’ page, click on the ‘KYC’ tab
![]()
4. Click on the ‘Choose File’ button, and locate the scanned copy of your Identity Document. Click again on the ‘Choose File’ button and locate the scanned document that will support your Proof of Address. Once you have chosen the files, click on ‘Submit’ button.

5. According to OneLife’s website, you can use the following as your identity document:
- National ID Card
- National Passport
- International Passport
Additionally, any one of the documents is accepted for the Proof of Address:
- Utility bills (electricity, gas, water, waste, etc.) less than 6 months old
- Document issued by a Bank less than 6 months old
- Document from Municipality/Government Agency/Tax Authorities – most recent
- Not expired National ID Card/Passport (all sides) if the address is shown in the document
- Other documents issued by the Government where the names and the address are shown
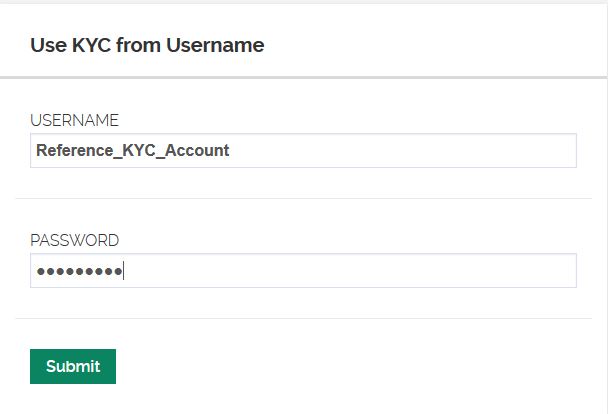
As I mentioned, if you have multiple OneLife/OneCoin accounts, once you uploaded and submitted the required identity and proof of address documents, you can use that account as a reference KYC for your other accounts. Just input the Username and password of the mentioned KYC reference account.
 That’s about it. Once you uploaded your KYC documents, you will just have to wait until your KYC status is APPROVED.
‘Til next time. Au revoir.
![]()
*We are OneLife Independent Marketing Associates. This article is based on our own independent understanding and opinions. If you have questions about OneLife, please contact your referrer.
*OneCoin is a Know Your Customer (KYC) transparent cryptocurrency. If you want to know more about OneCoin, please visit its official website at https://www.onecoin.eu/en/.